


Workbench envy is real
A tribute to my mongrel farm breed workbench

I have a confession to make. Since discovering Instagram and YouTube some years ago, I have developed an unhealthy obsession with other people’s custom-made workbenches. Some, like the Roubo style benches, are heavy, clever, and have sexy leg vices, tail vices, beautiful contrasting timber, square dog holes, detailed dovetails and mortice & tenon joinery. Yet some are refreshingly minimalist and functional, like the staked Roman-style low benches and the British Pannel “Nicholson’s” workbench.
I love them all.
I have purchased plans and have drawn twice as many in my notebook. I have budgets in a spreadsheet and got quotes on timber to build one. Yet, I still have had the “same” workbench for the past 29 years.
My workbench and I have a history and have grown in the craft together. As I have evolved, so has my bench. Each part of my bench is linked to a stage of my life. Like a good song, I can look at a part of my bench, and I can tell you where I was and what I was doing when I added it or modified it.
My bench started as a Jarrah tree on our farm and some shed flooring. My brother and I needed some timber to modify our sheep yard, so we cut down the largest tree we could find and trucked it down to the old sawmill at the end of our road run by an old farmer and part-time sawmiller Loui Guidi. The old sawmill was something from another time. A two-metre circular saw driven by a long belt off a huge single-cylinder kerosene-fueled engine in an open-sided shed.
I need a new workbench as the main workshop was 5km away on the other side of the farm. So I raided some 4x4s and 1 x 6s from the timber we had milled, plus two large 2” x 12” Wandoo beams from a raised floor in our machinery shed. This was a functional, simple timber-framed bench built with coach screws and cup head bolts. It had rough-sawn the top with no attempt made to flatten it. It was heavy and did the job. The log I sourced the rough timber from was cut for yield and not quality, so you can still see the gum lines in the front legs.
Bench moves to the city.
In 2001, we left the farm and moved to the city, and my workbench came with me. The first problem I encountered was it needed four people to move it, and although the size was OK for a big shed on the farm, I found it hard to find a home in Perth.
It sat unused and unloved for many years in Perth while I was starting a new company with my wife and raising three small sons. The only change made to the bench in the next 21 years was some wheels so that I could move it around and a sheet of black laminated MDF I had left over from a pallet screwed on the top to make it flatter so I could do some finer work on it and stop screws falling through the holes! I also put a sheet of melamine under it to create a rudimentary shelf for my tools. It was crude, but it did the job.
I started to spend more time on my woodworking and transitioned back to working with mainly hand tools. (I still use power tools for home maintenance and extensive project carpentry, e.g. building a new deck.) I started nerding out on the craft by reading more, watching more, and studying masters more. As a result, my workbench needs and wants began to change. This was the beginning of my workbench envy.
I thrive on the creative pressure that comes with scarce resources. My best work as a woodworker and our best decisions in our software company come from not having enough resources to do what we want. I did not have the budget or the time to build the dream bench I wanted, so my old bench needed to regenerate like DR Who at the end of an actor’s tenure.
Let the regeneration begin.
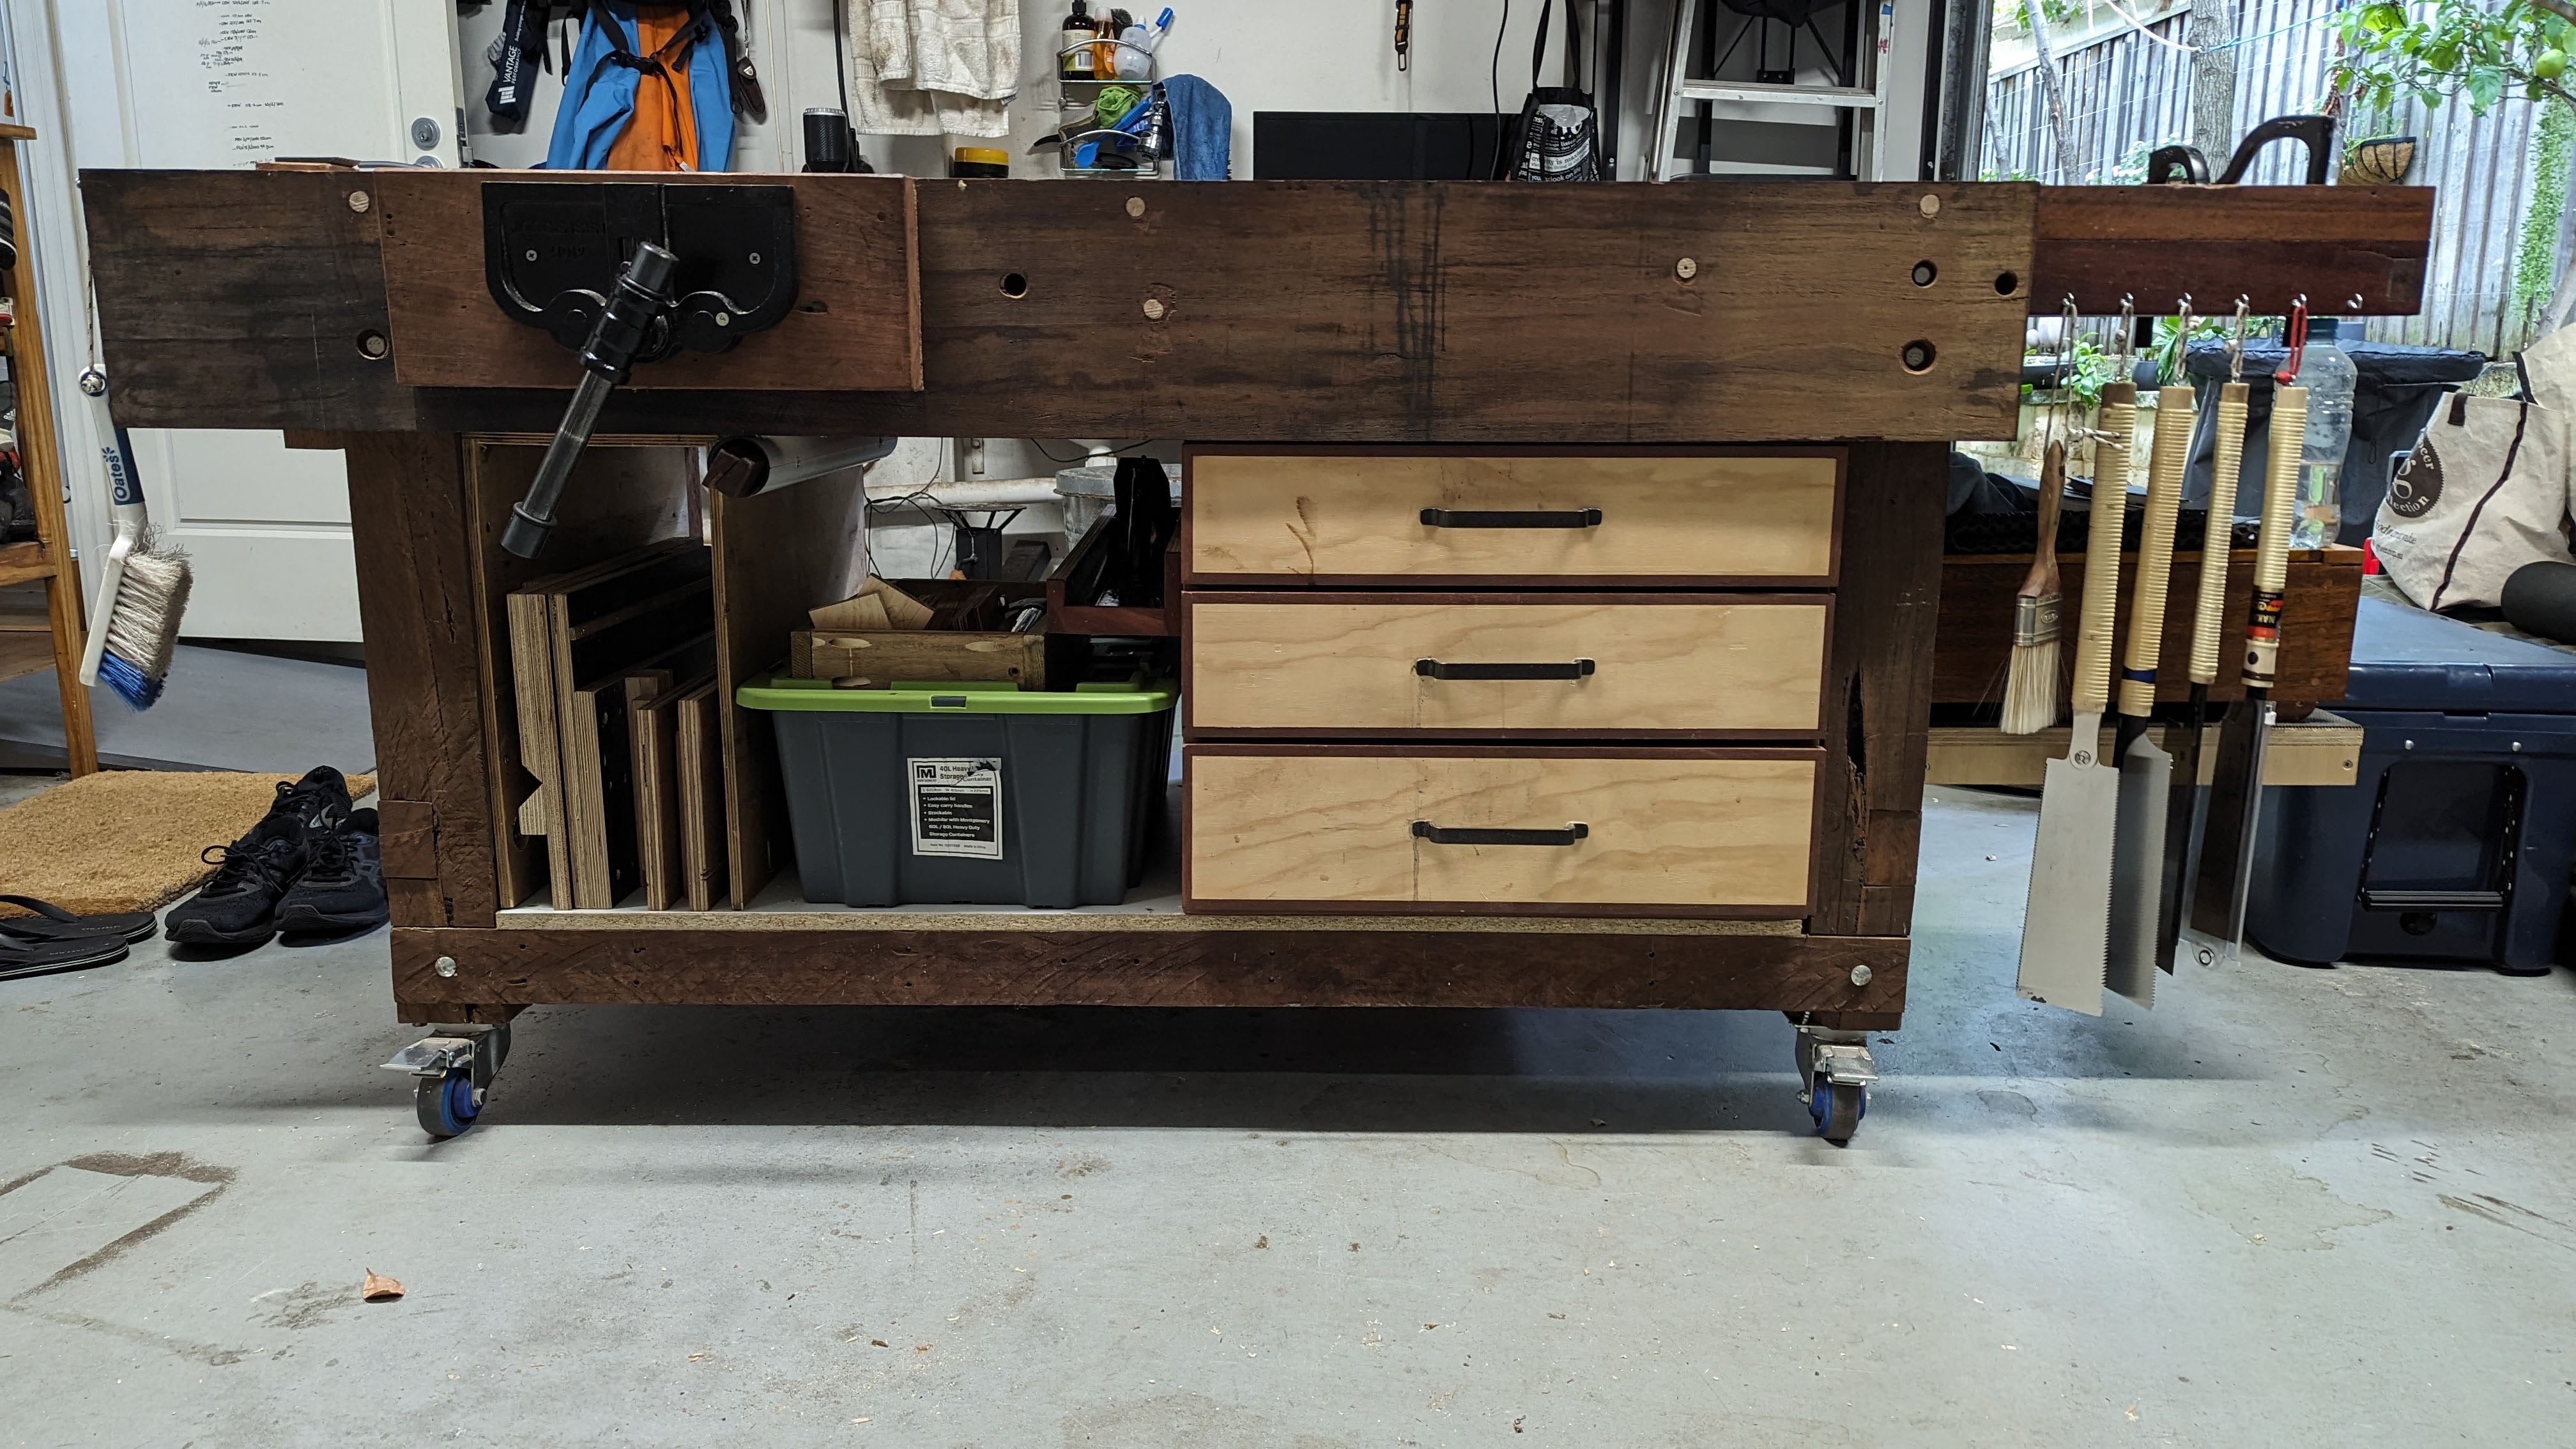
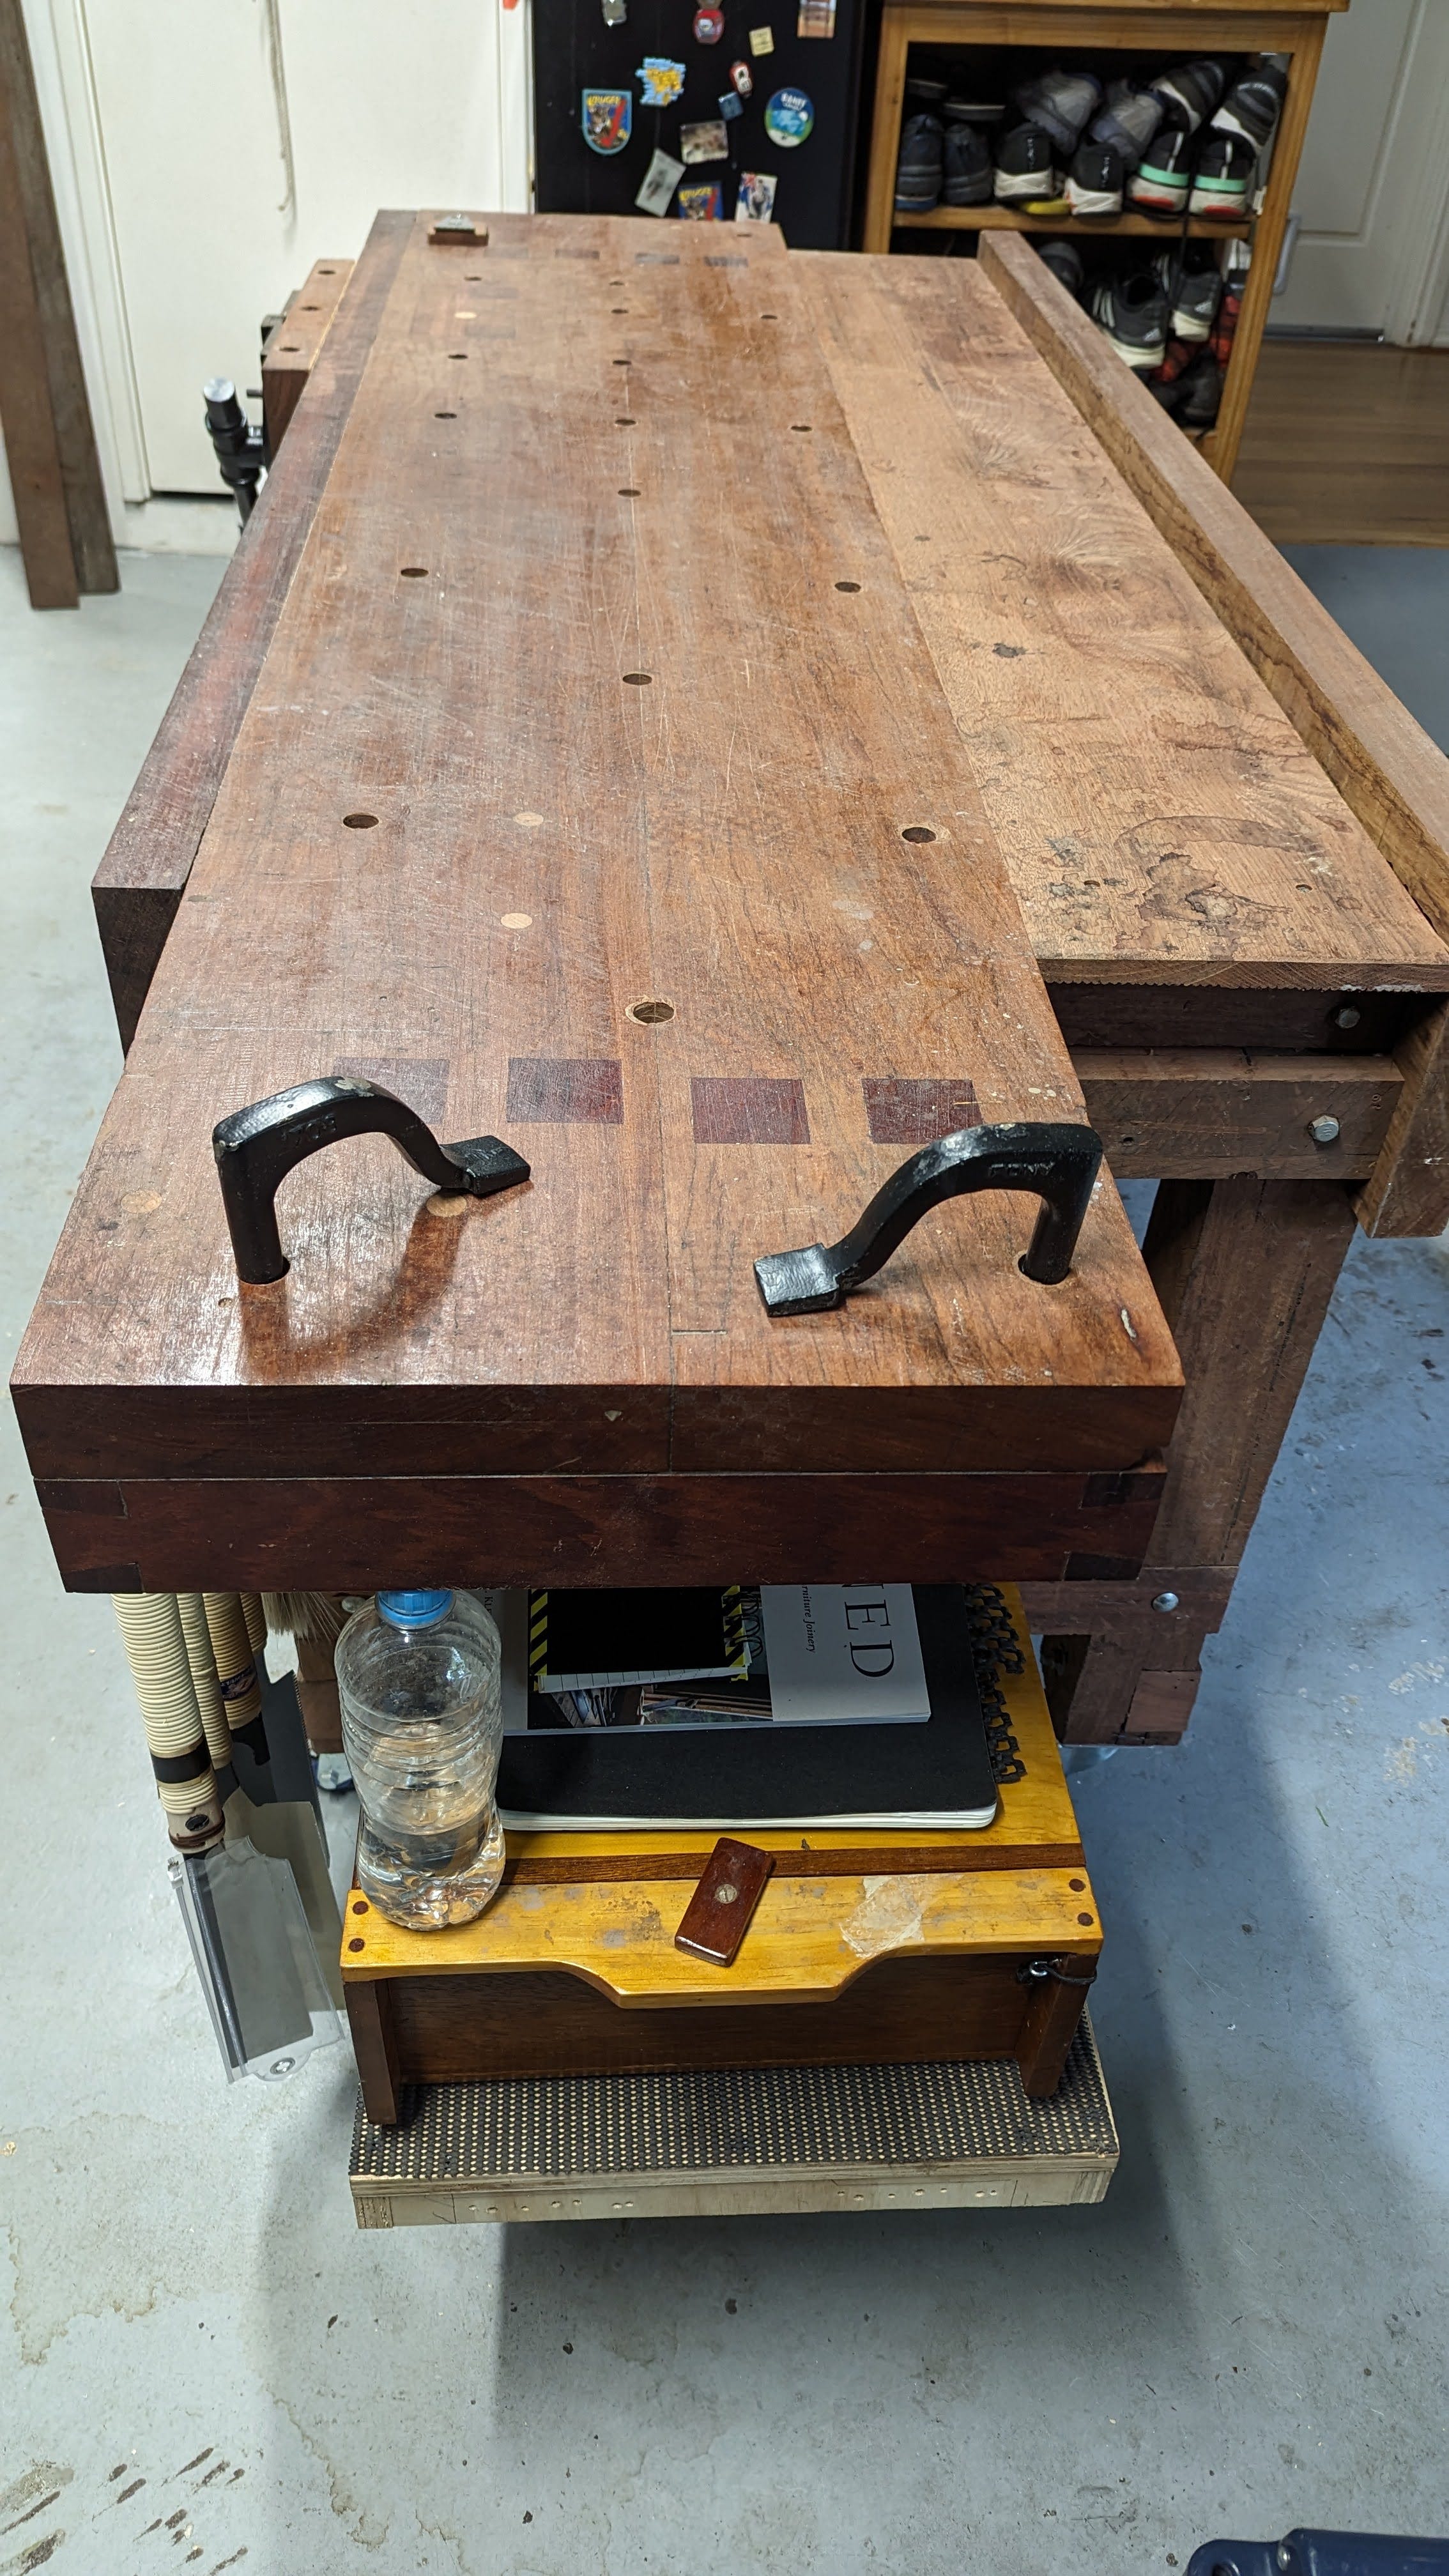
I needed my bench to be narrower and flatter with better work-holding and some storage. I needed a bench for fine hand tool woodworking.
The regeneration started with completely disassembling my 26-year-old bench and cutting it to 700mm wide. This was followed by jointing and joining the two 2”x 12” Wandoo boards to create a new bench top that was 2100 x 400 x 50mm.
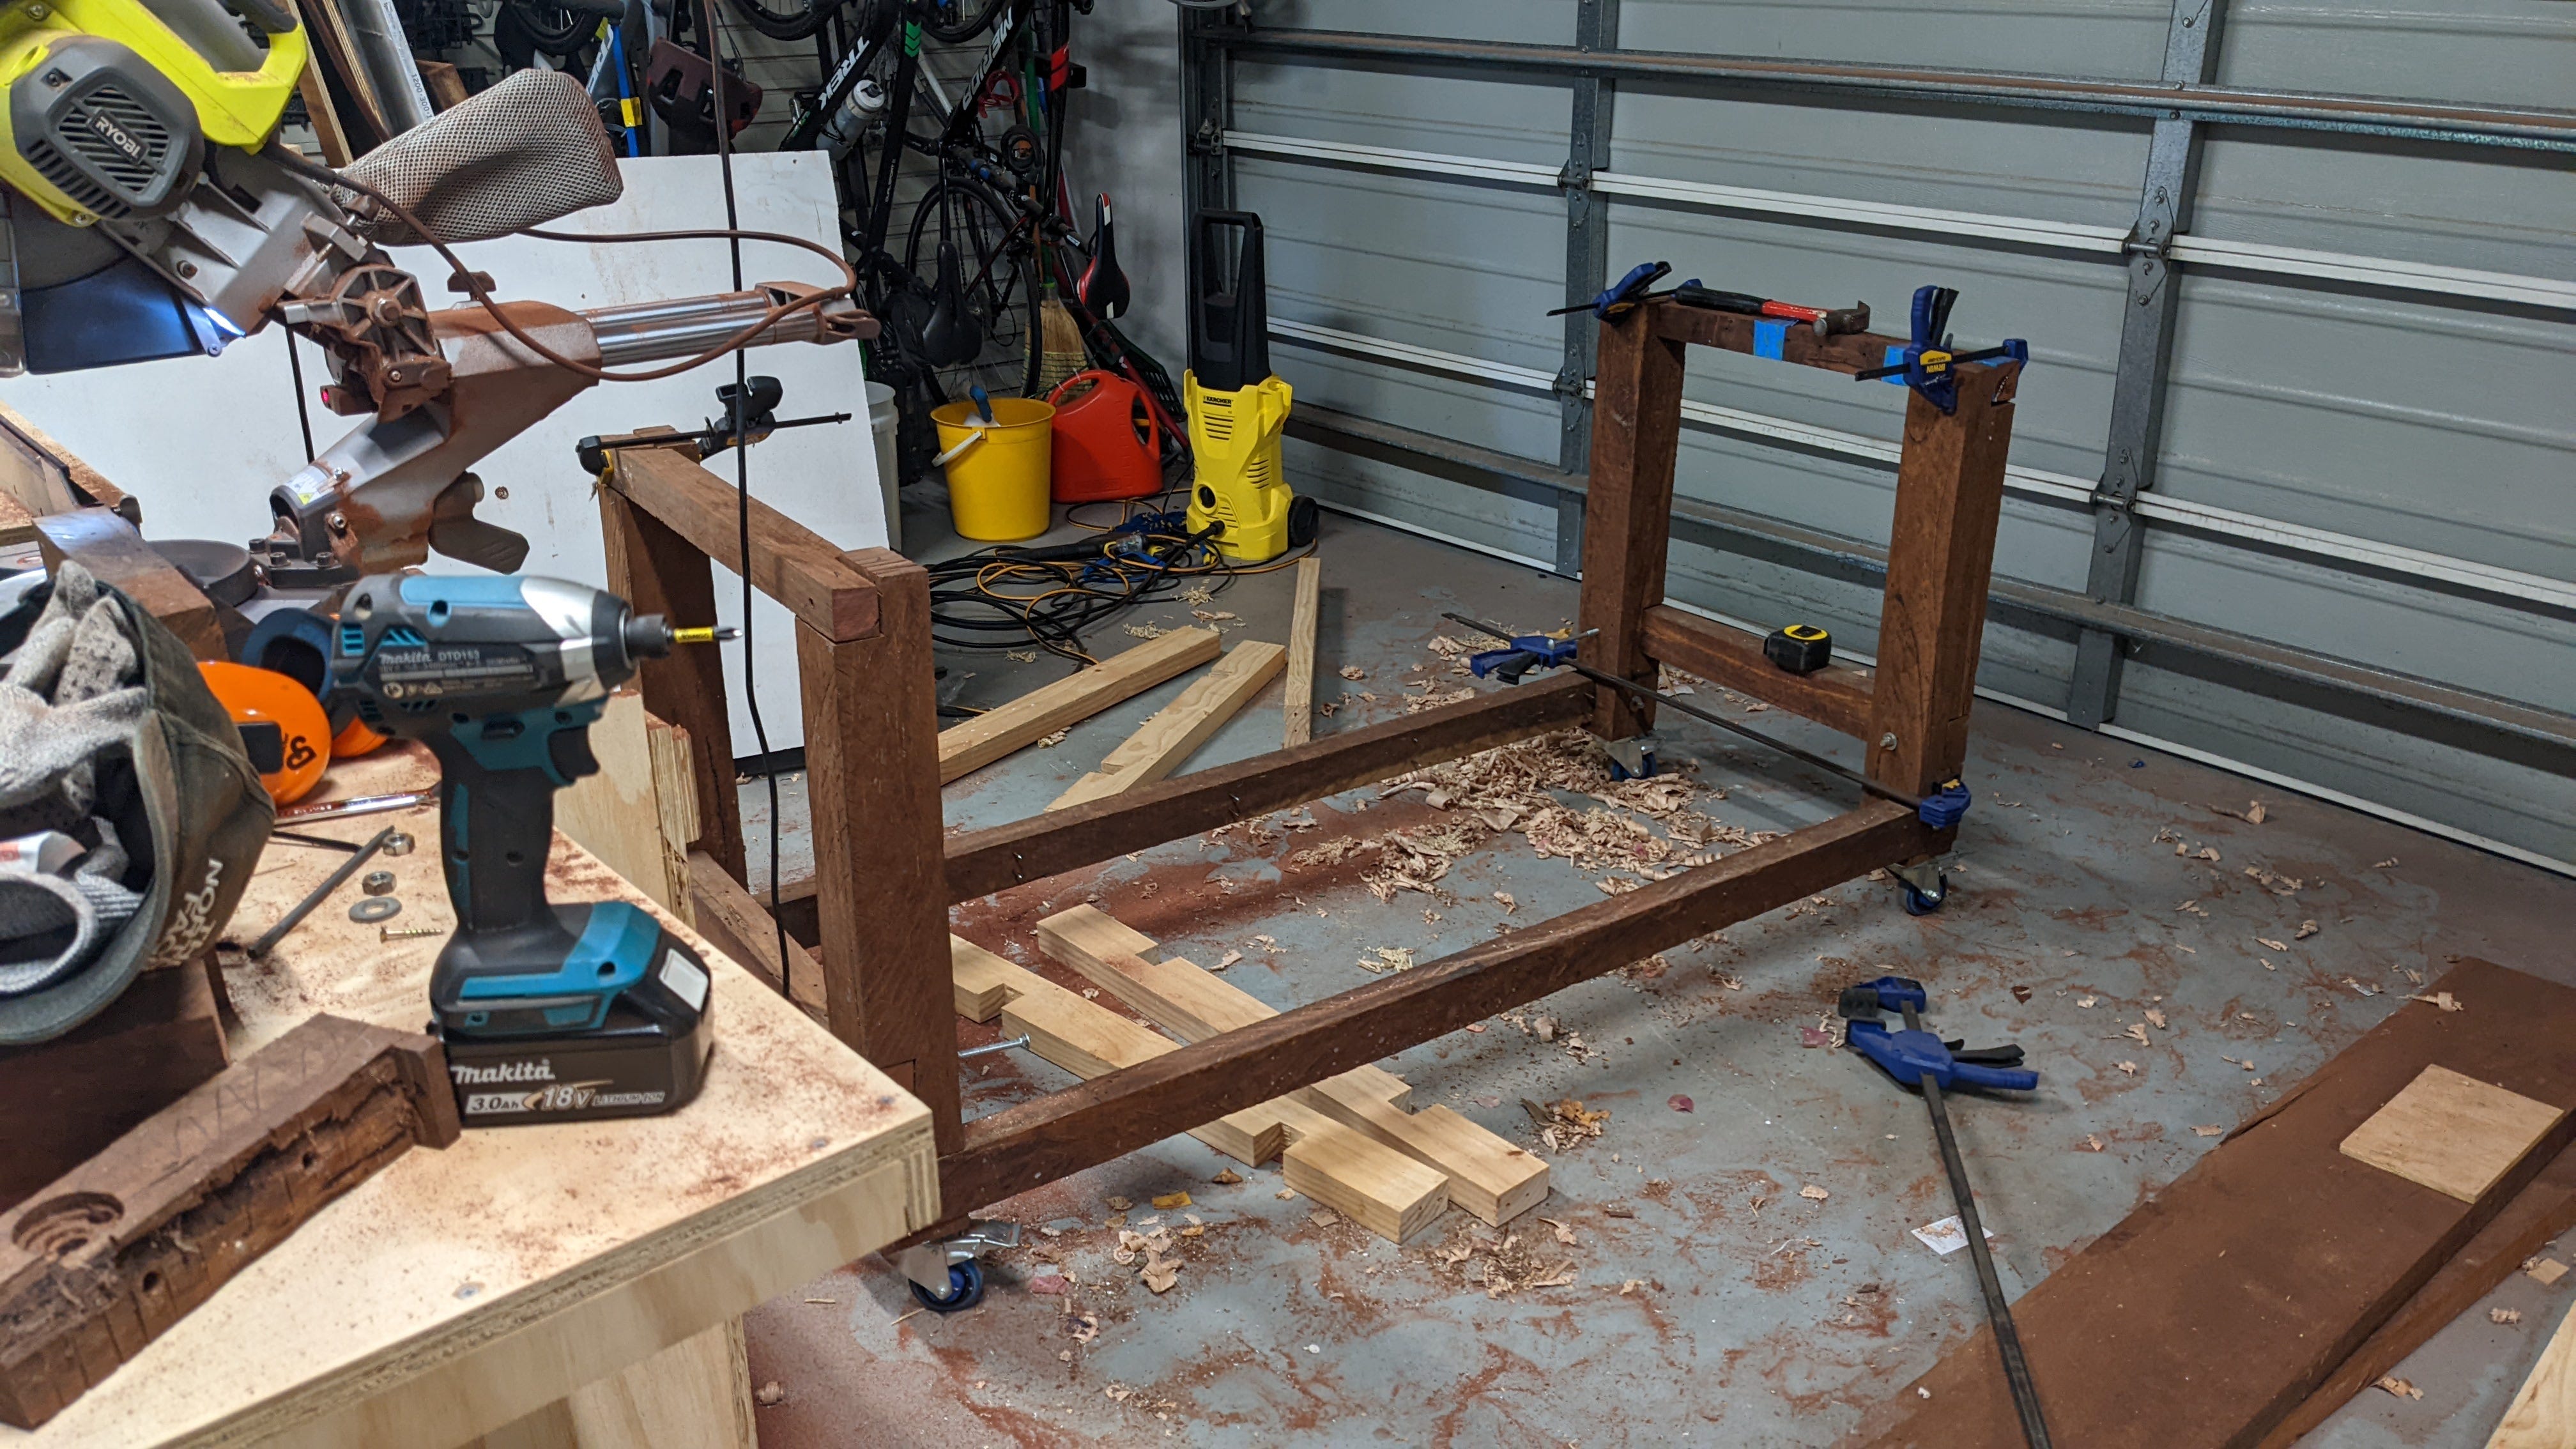
I then built a frame under the benchtop overhang to give it rigidity and depth.
I also wanted rigidity to the basic frame, so I added two large Jarrah 250mm x 50mm boards front and back. These were rebated into the legs to stiffen up the whole structure. I borrowed these structural elements from Paul Sellers’ workbench design. (these two boards were salvaged from two small old workbenches that were being thrown away in someone’s house clean-up)
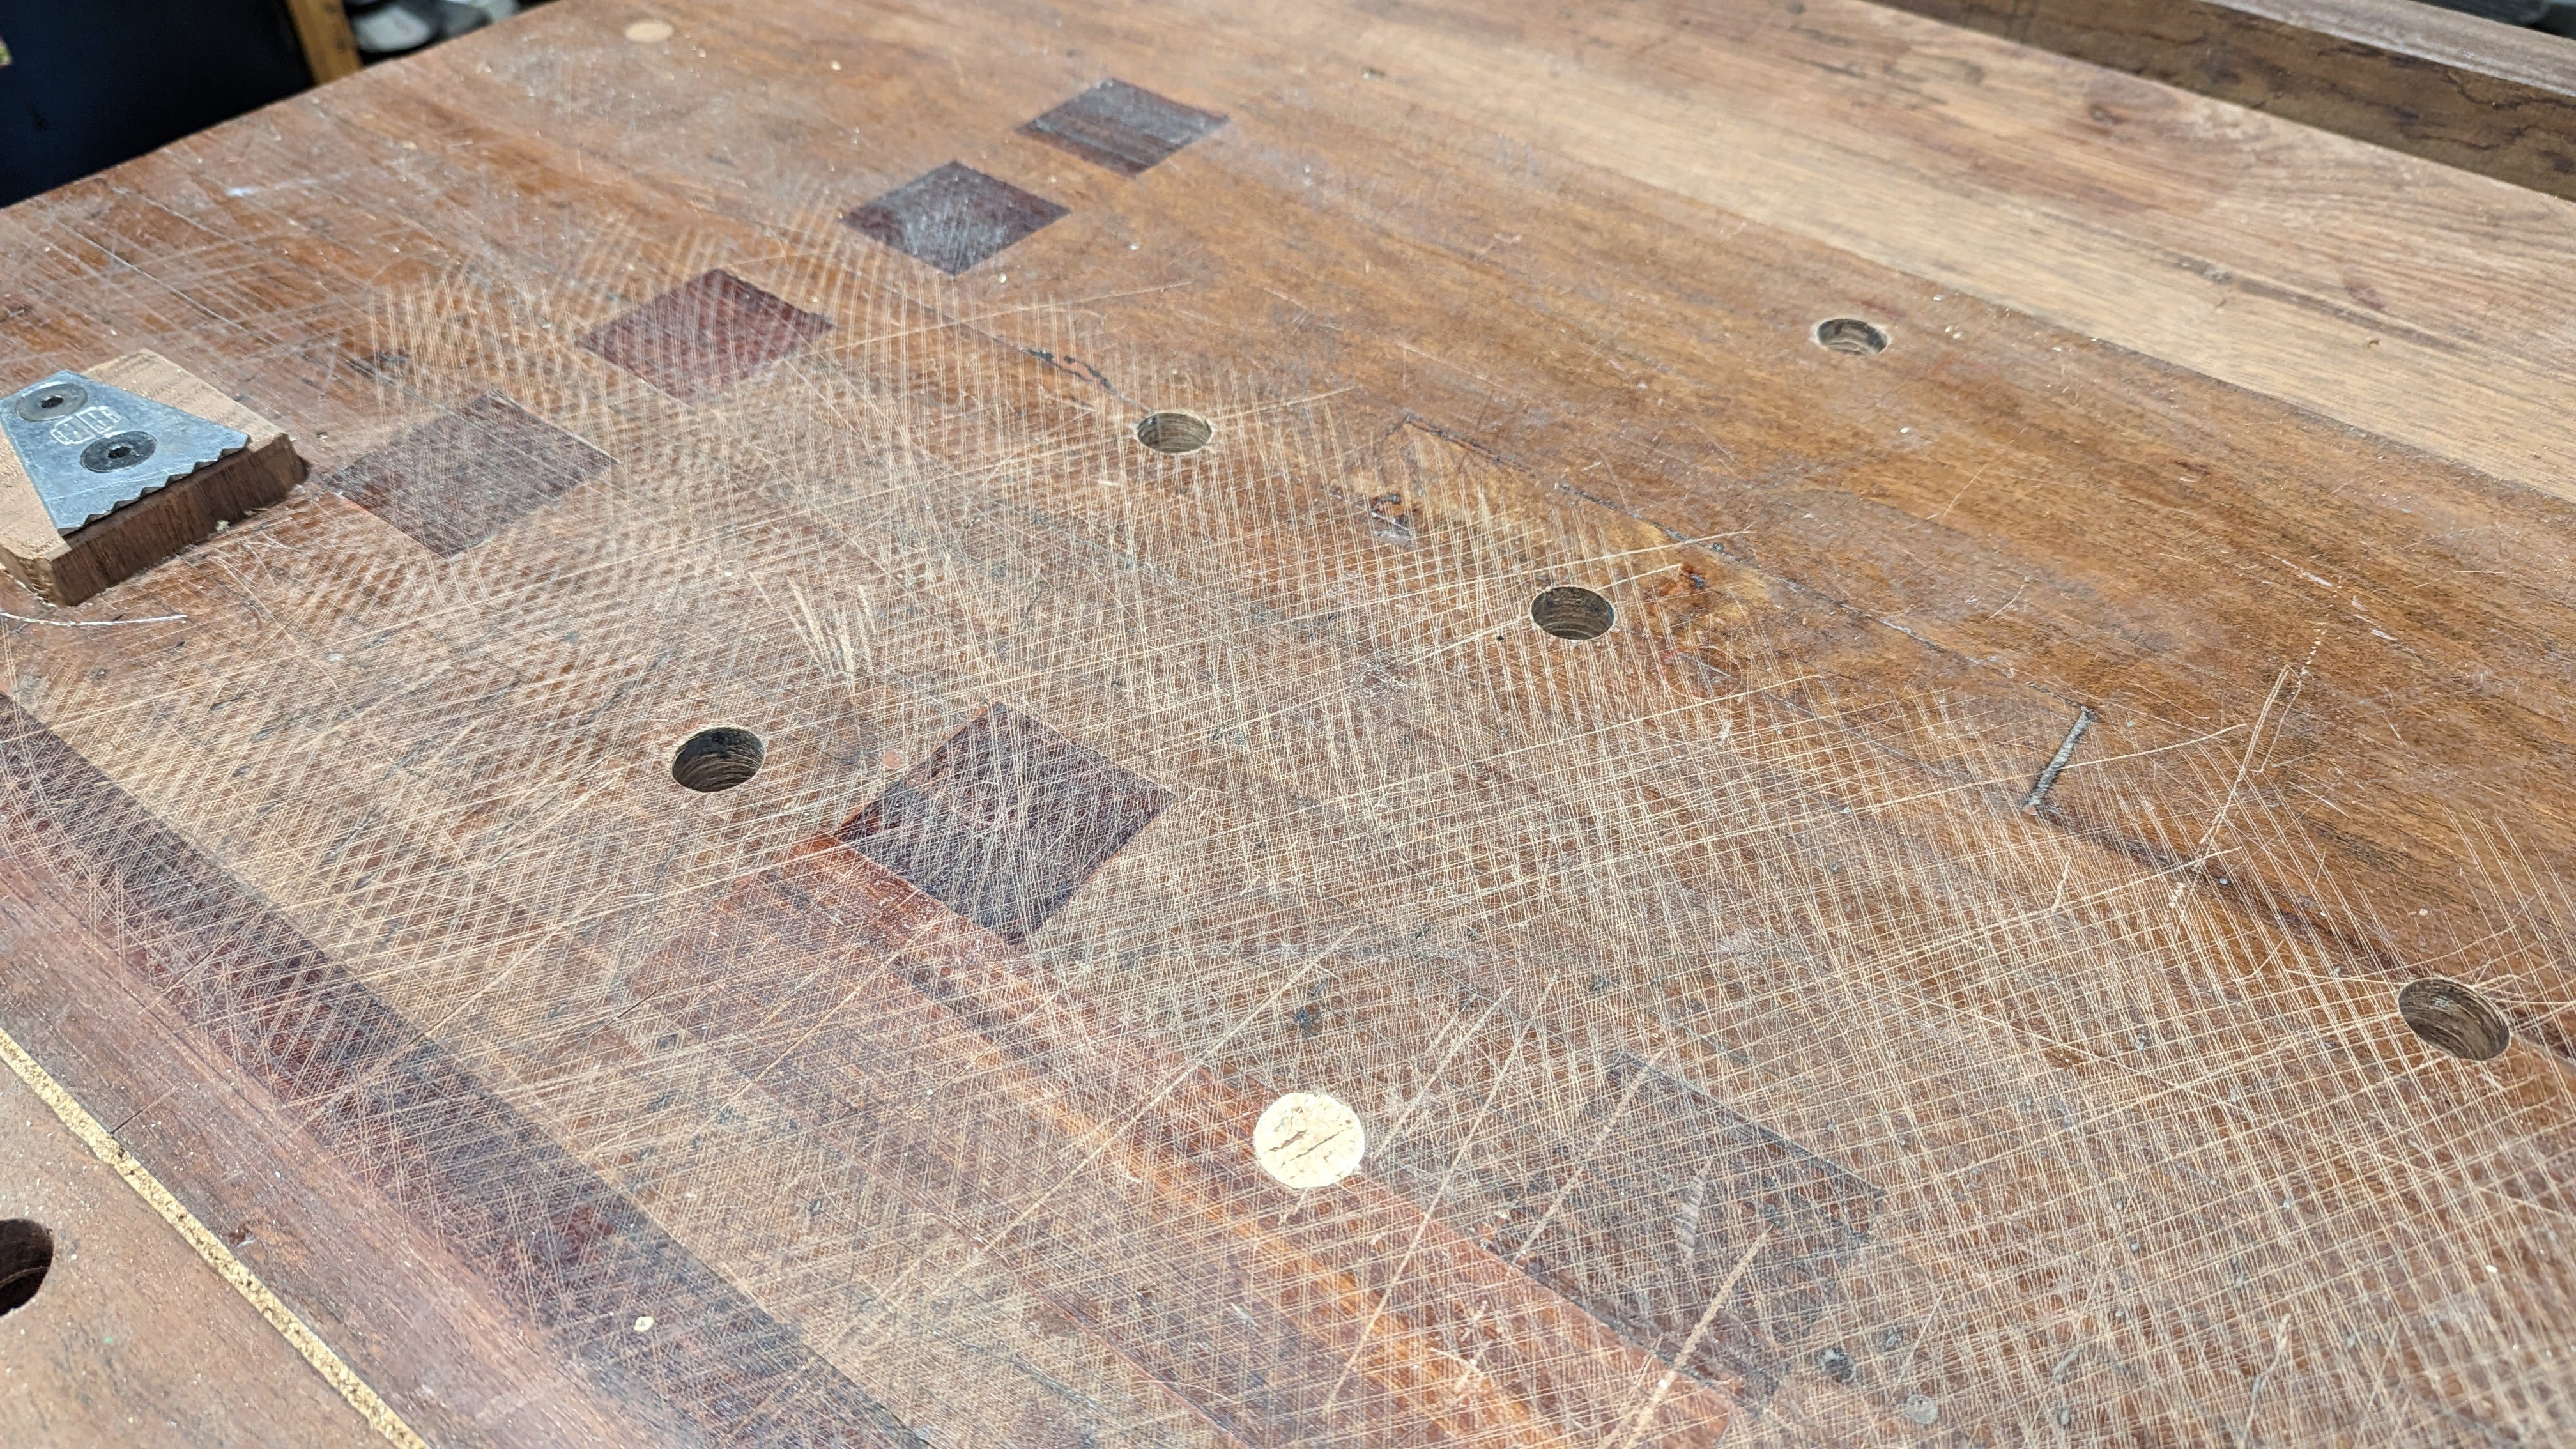
I filled all the old bolt holes in the top with some Dutchman patches from scrap Jarrah. I love the look of the inlay repairs on the top.
I added an open-ended tool well in the back, joined to the top of the bench and the back with a dado that runs the whole length. It is more like an offset tongue and grove joint.
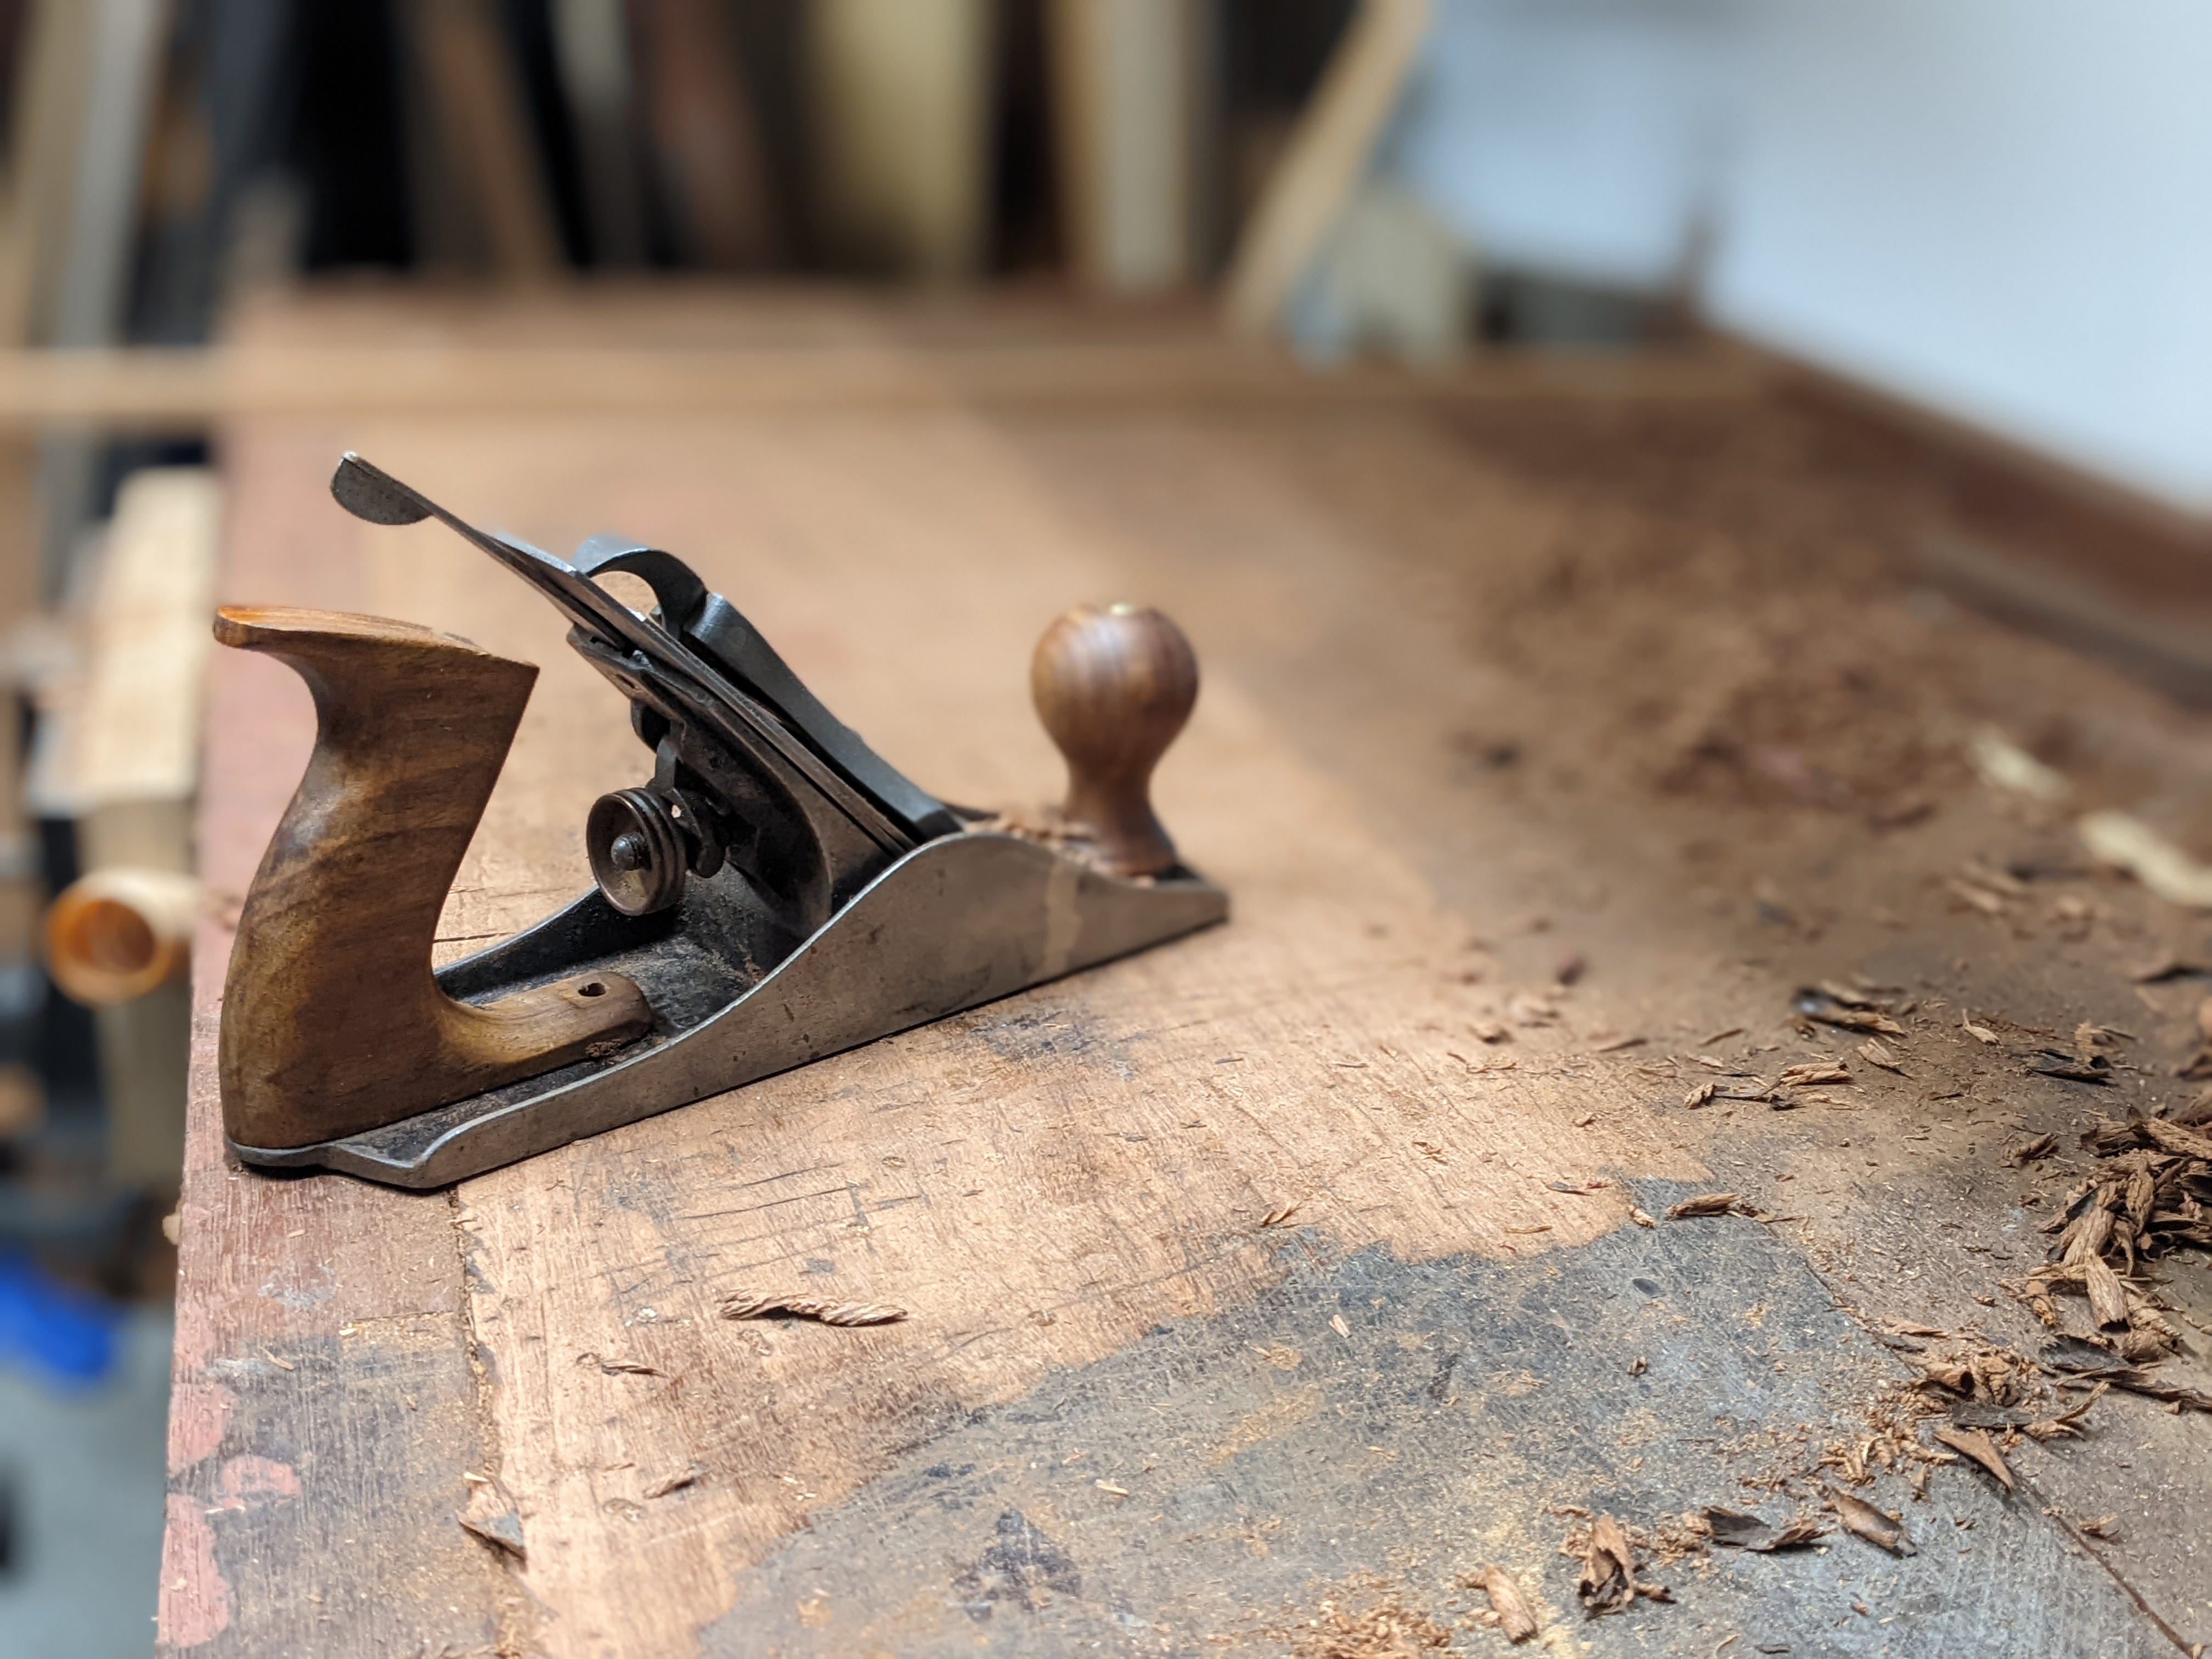
Flattening this bench was backbreaking work! Wandoo (Eucalyptus Wandoo) is one of the hardest woods in Australia, with a Janka rating of 15Kn (3372 lb/f), similar to ebony. The process started with a scrub plane I made from an old, broken and welded #4 Stanley. This was done over many days and hours with lots of sharpening. The final surface was finished with my Stanley #6 and a few coats of Danish oil.
I scratched up the whole surface with a hack saw blade to give the timber some grip on the hard surface. (A tip I got from the boys at Mortice and Tenon magazine). The wandoo top is not ideal for a woodworking benchtop as it is too hard and slippery, but it is what I had.
I installed a new Pony Jorgensen Professional Rapid-Acting Vise and a planing stop from Benchcrafted. I love both of them.
Dog Holes
The internet is full of questions and advice on dog holes and where to put them or if you need them.
I decided not to install a tail vice and instead use a combination of holdfasts and a planing stop for all my wood holding needs beyond my front vice. So, the dog hole pattern on my bench is based on a design published by
and it works very well. I have added some dog holes to my front vice jaw, but I find it quicker not to use them.
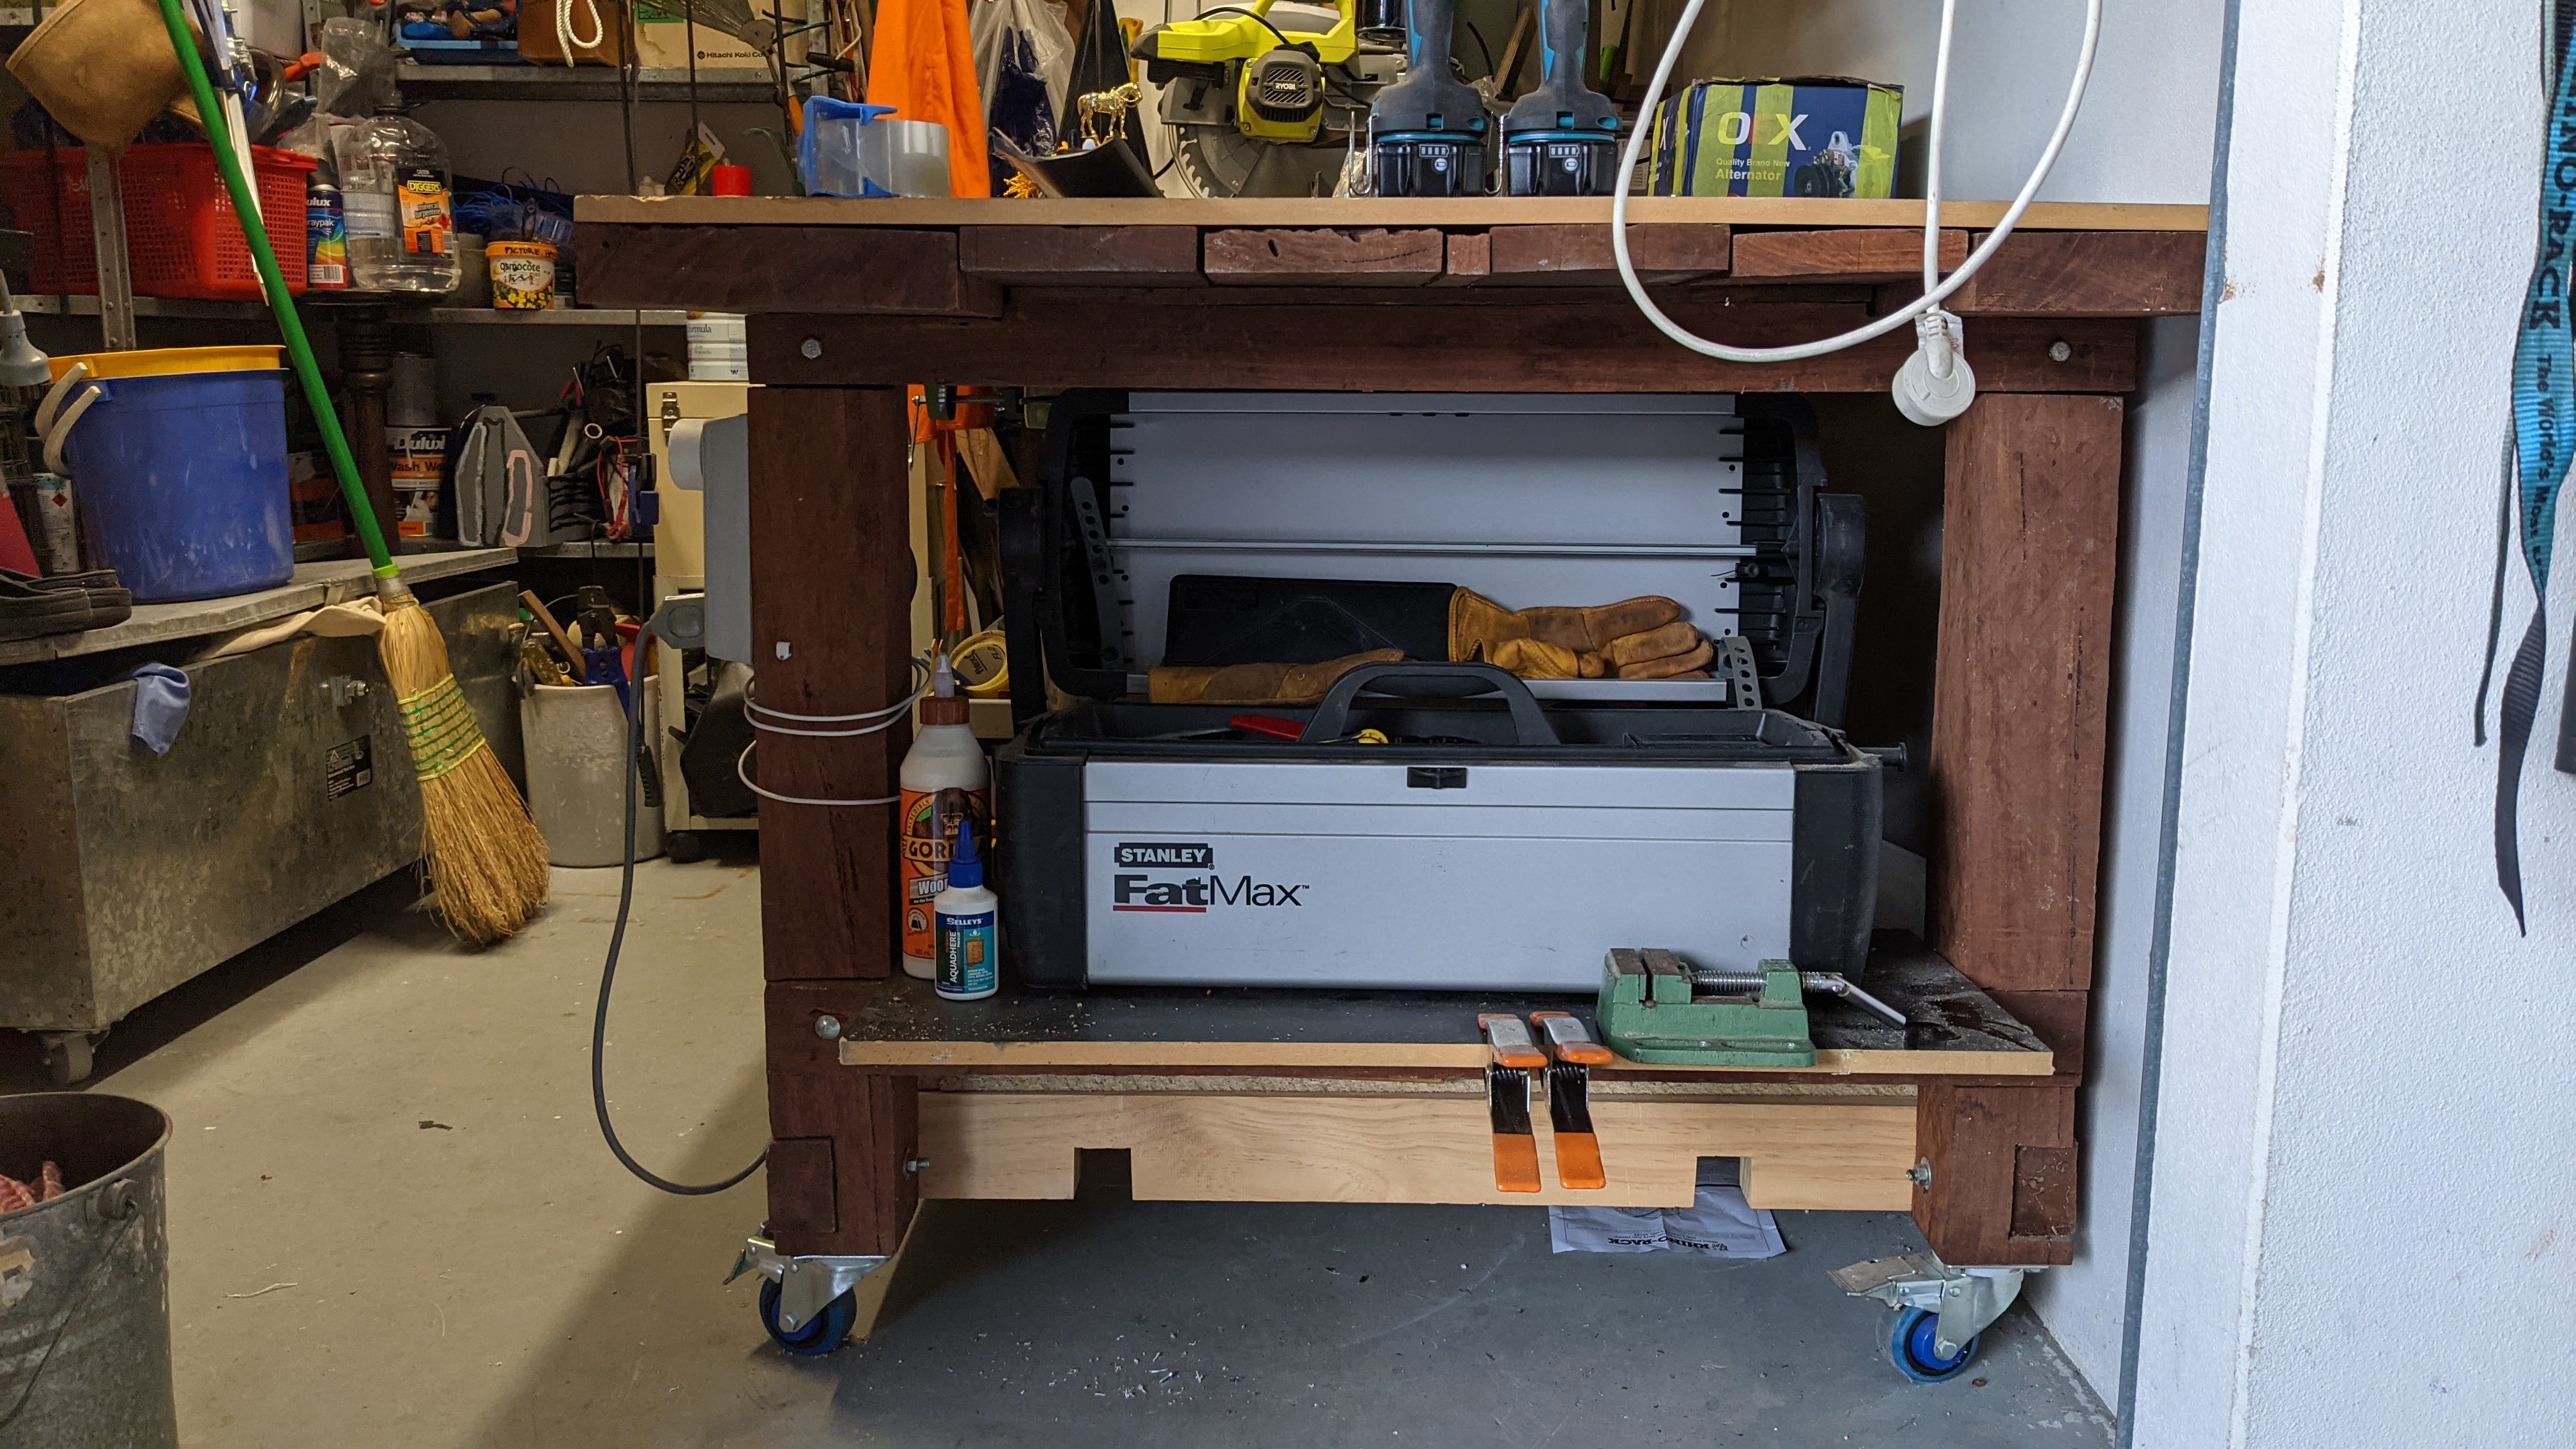
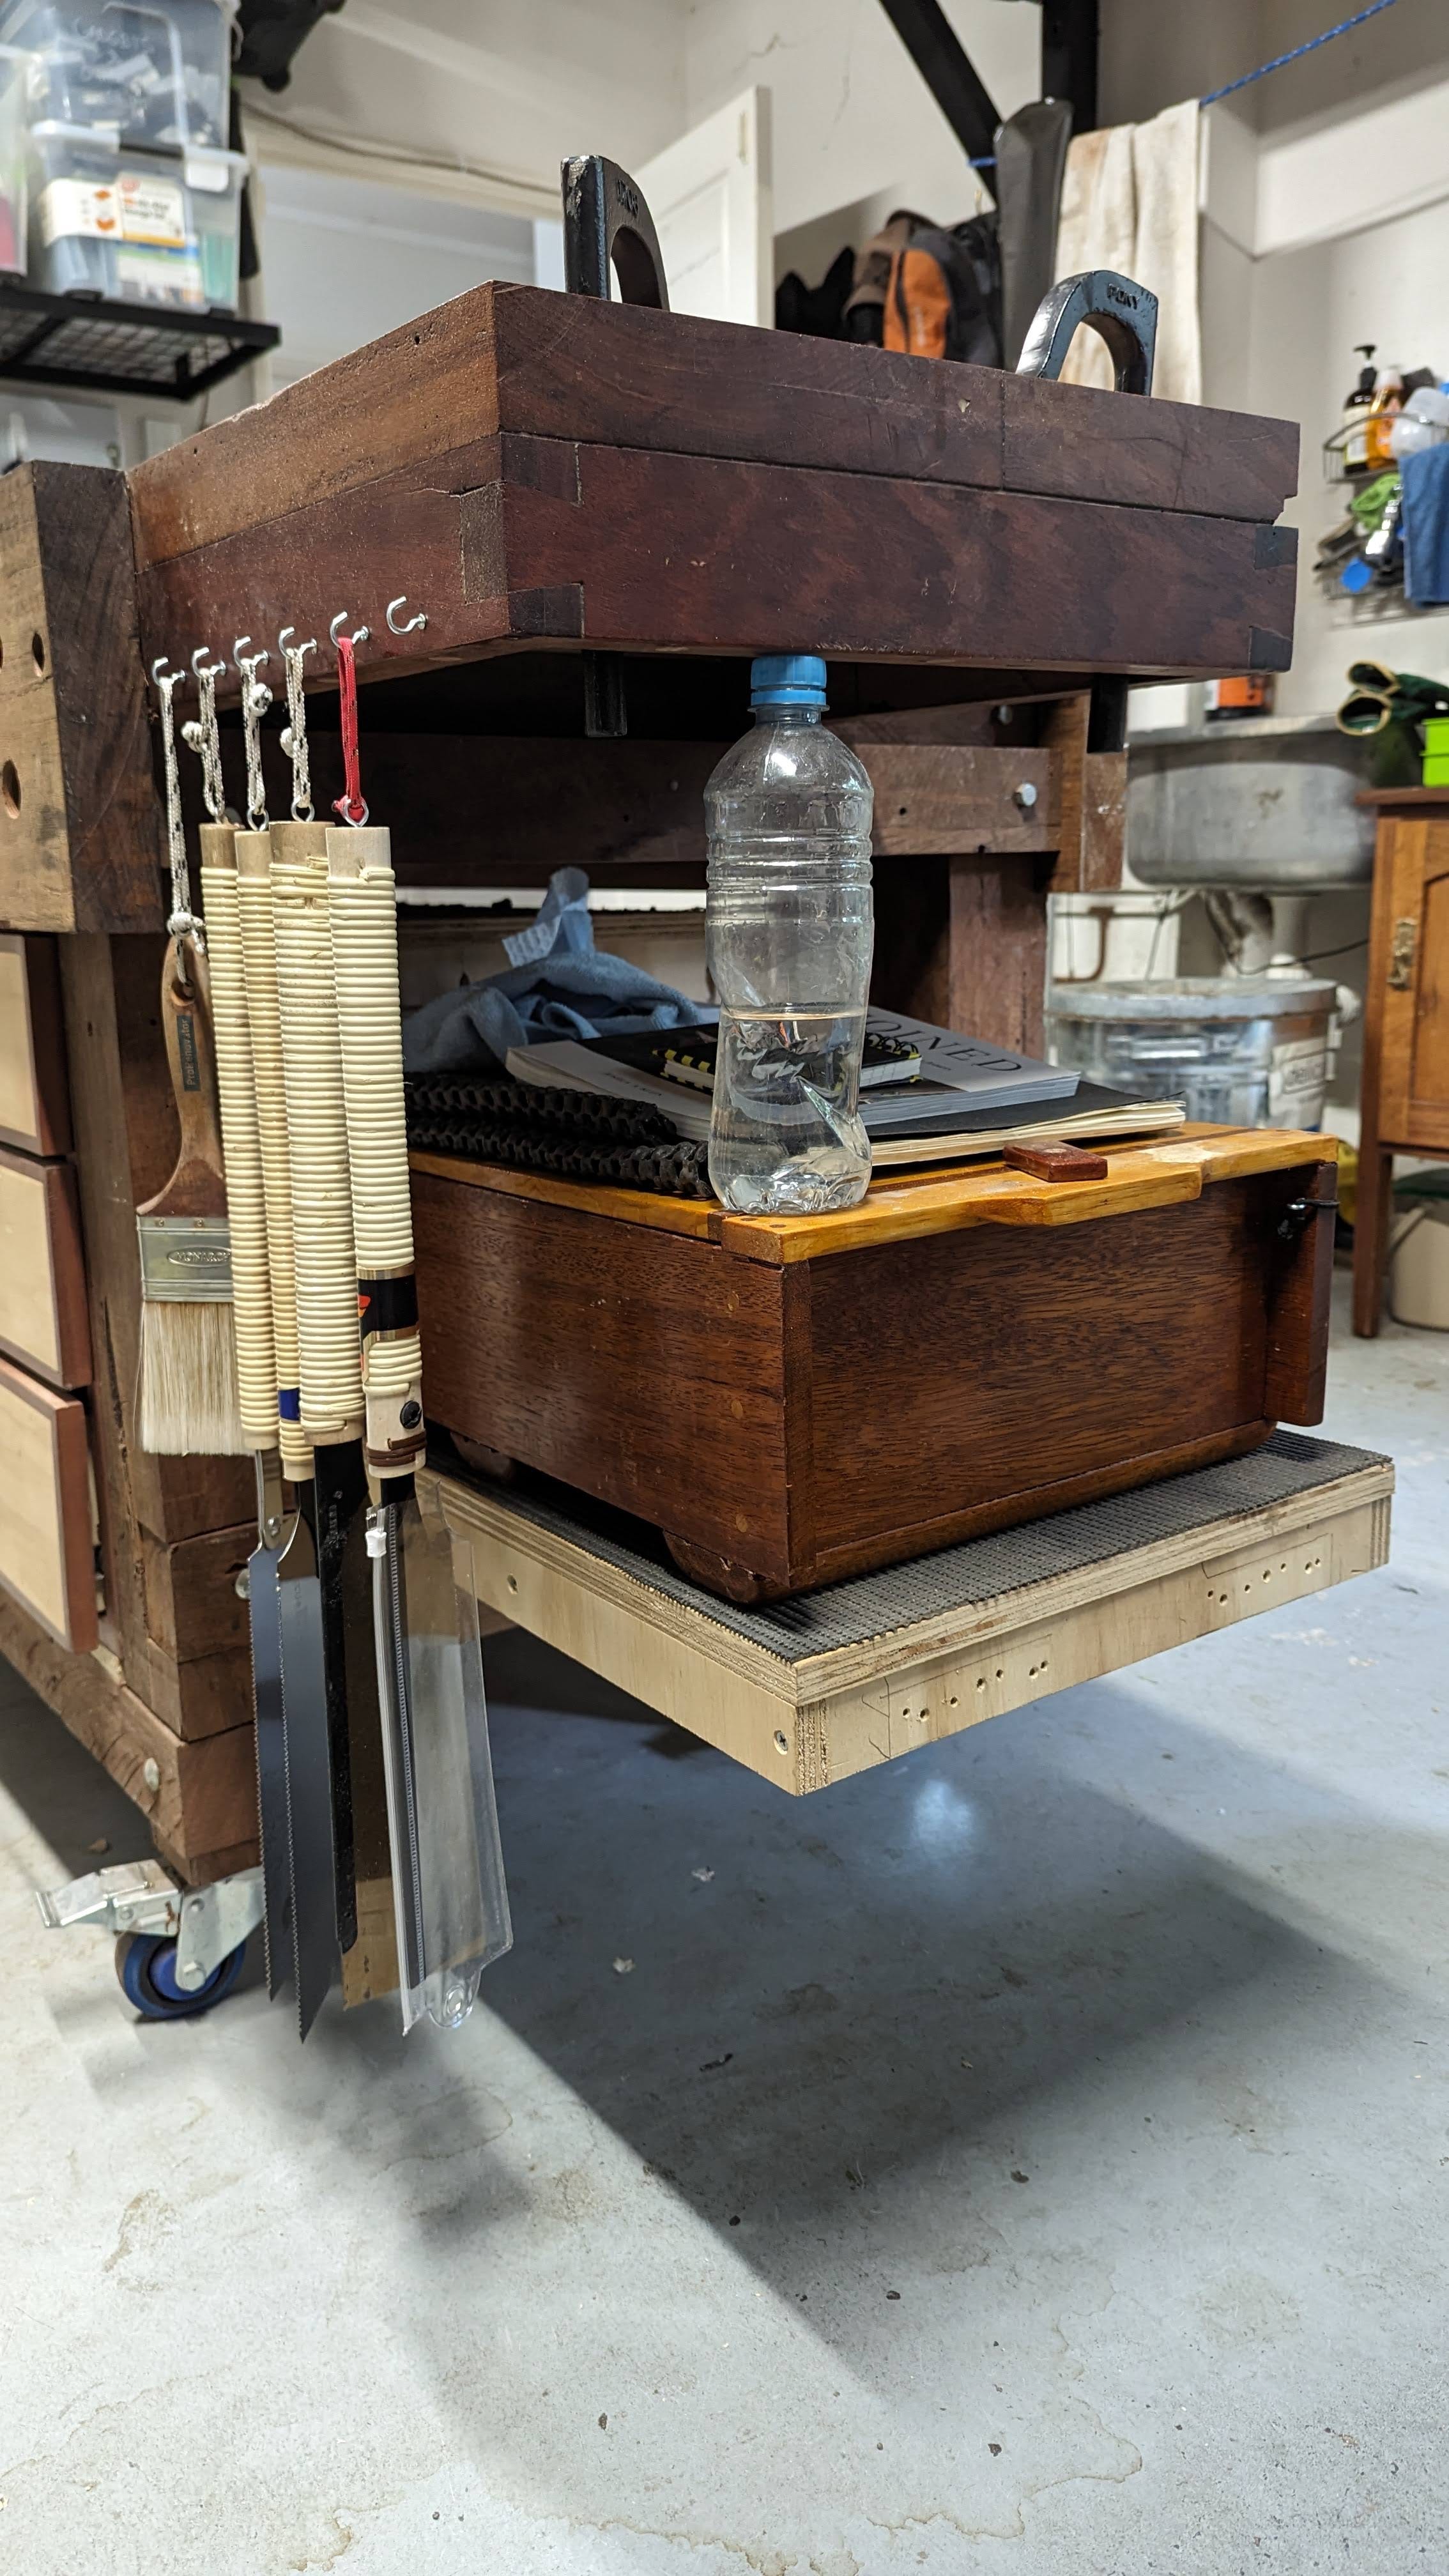
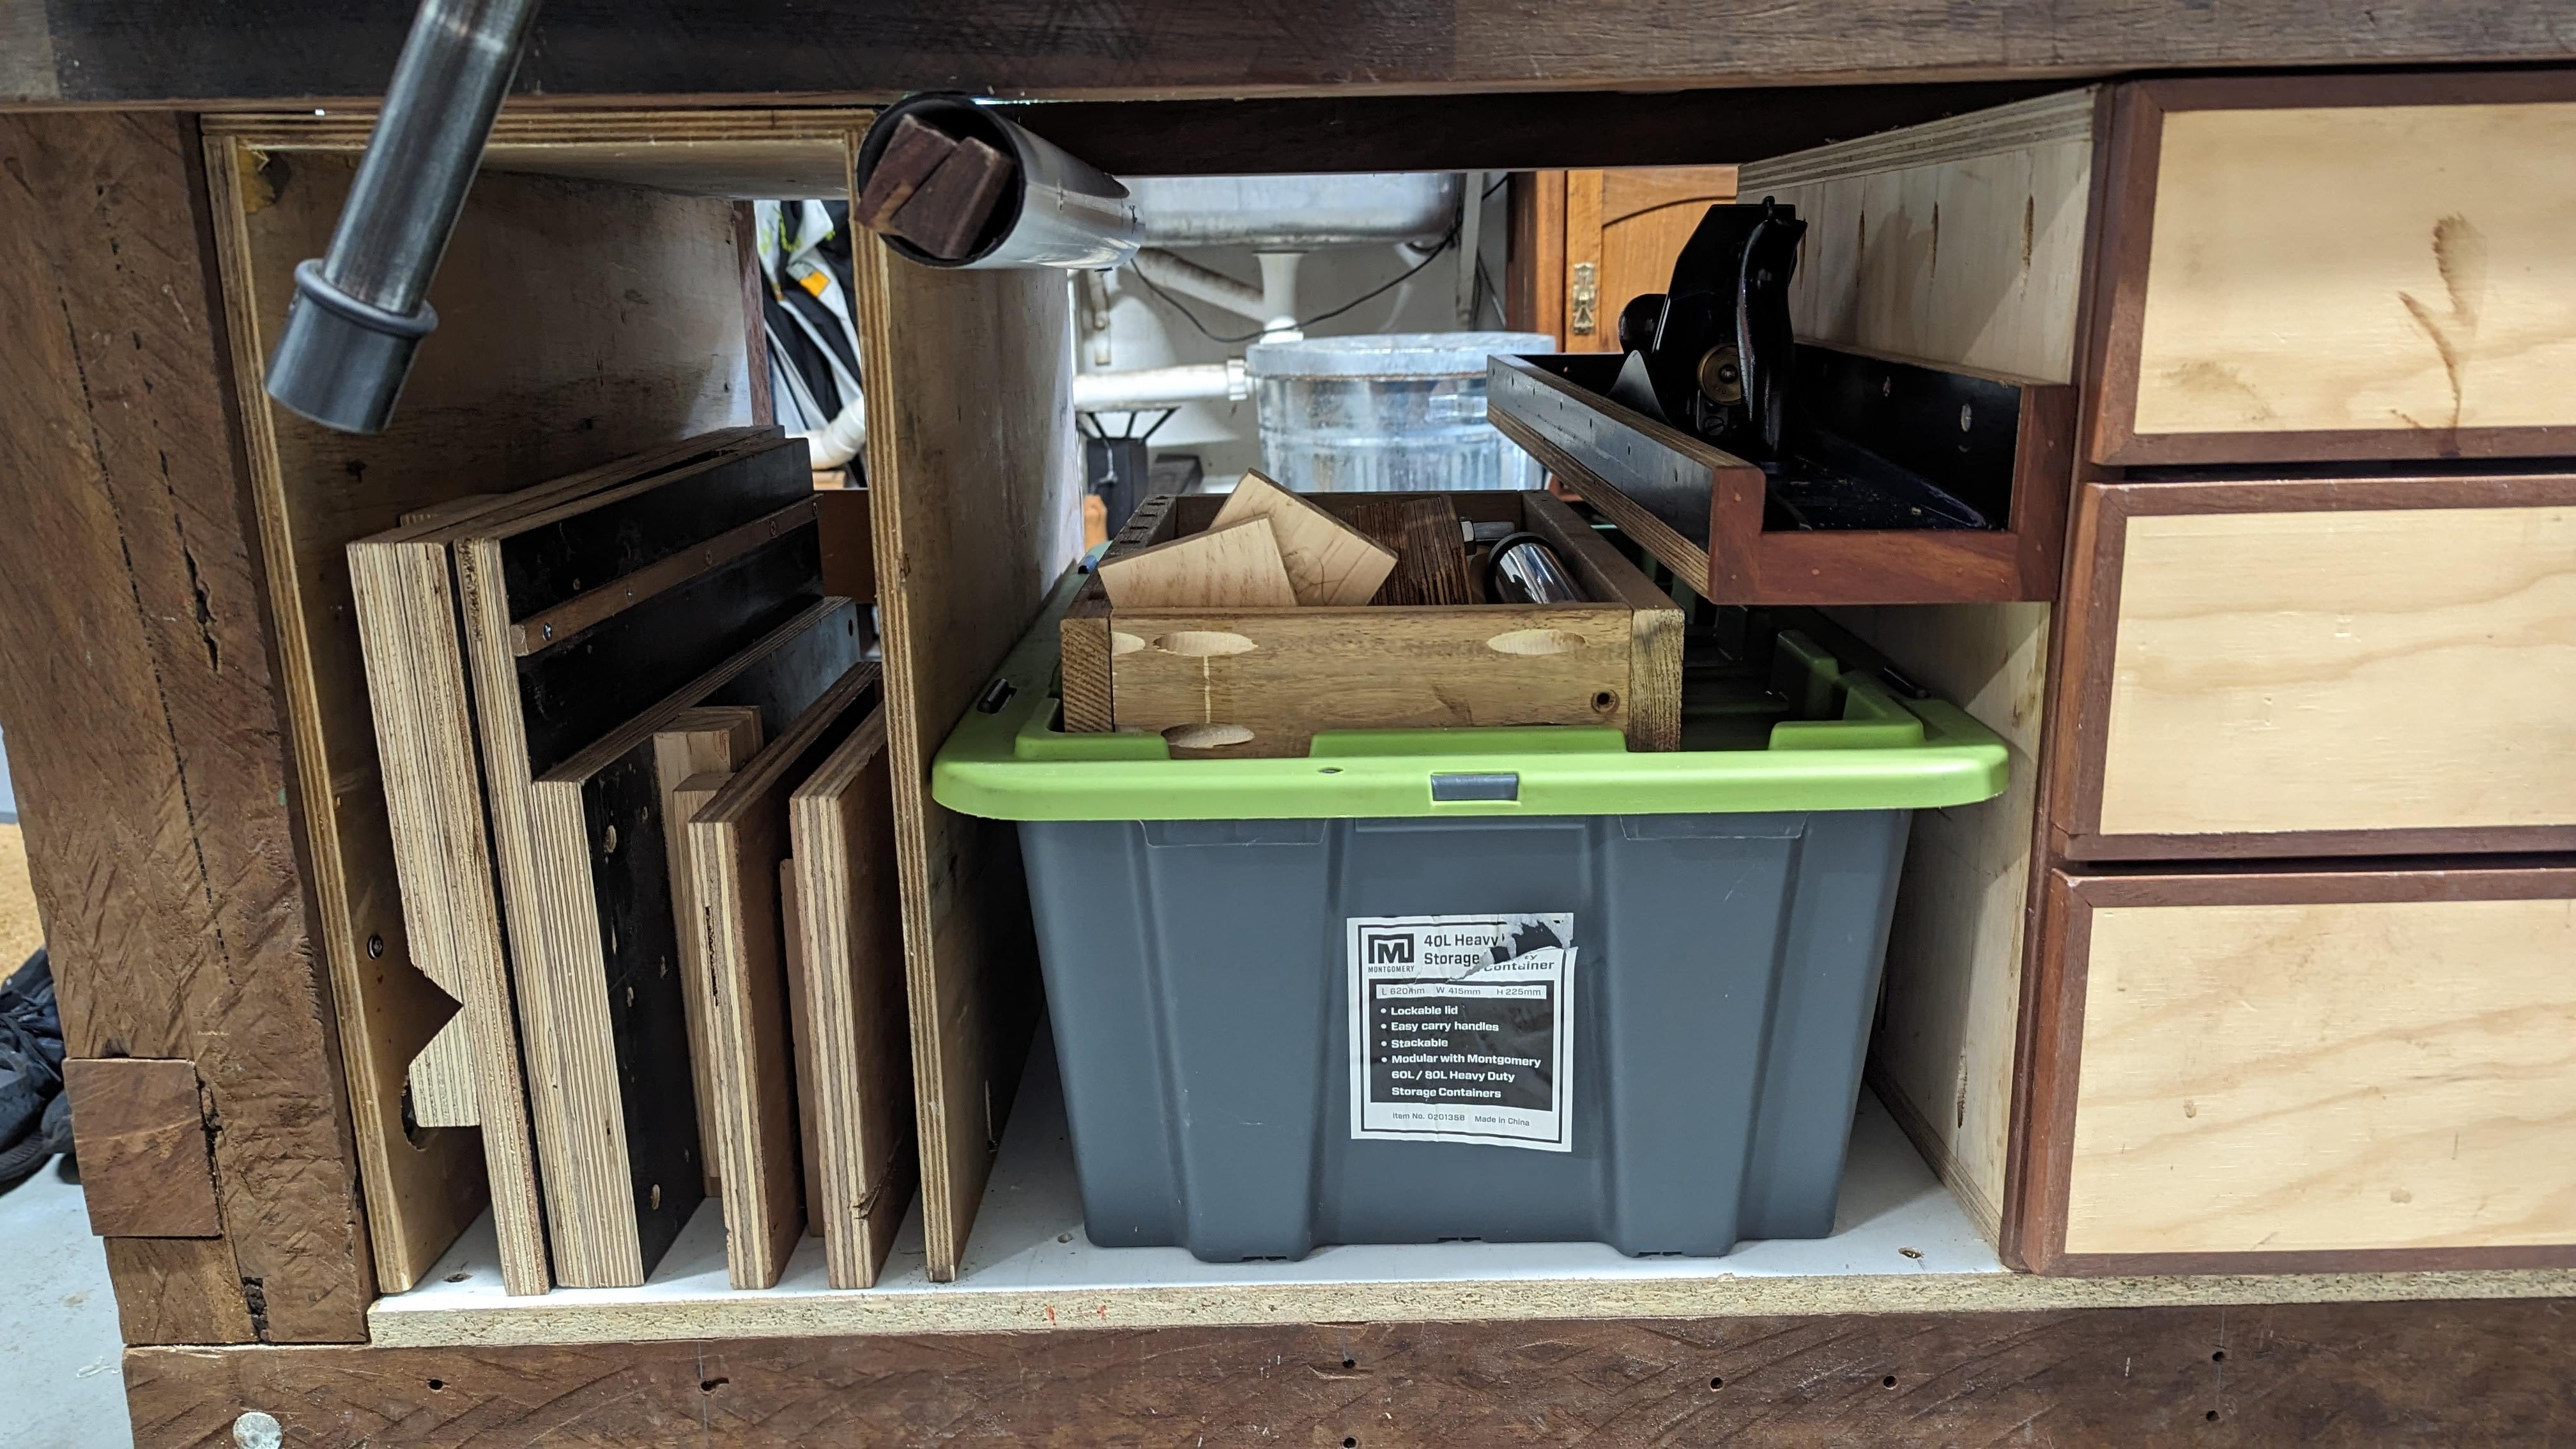
Tool storage
My workshop is tiny, so when I can, I like to push my bench out into the garage to do my work. Therefore, I have added much of my essential tool storage to my bench.
The three draws underneath all of my measuring tools, chisels and mallets & most of my hand planes. I have a special hand plane shelf for my #7 on the side of the cabinet.
I have a section to contain my shooting boards and bench hooks. Plus, I have a section of PVC pipe to hold my winding sticks.
I have a box to hold all of my less frequently used tools and a shelf on the end to hold my sharpening station.
My bench continues to evolve every year, and I would like to finish the remainder of the top and sides (Purely for aesthetic reasons). Plus, add wheels that can fold away so that it has a better purchase on the floor when planing and sawing.
I no longer have workbench envy as I like my old renovated bench, and it does a great job. It would never make the cover of a fine woodworking magazine, but I am proud of it.
Thank you for reading.
Cheers
David
A great story David - and some ideas and inspiration for my own portable “roll it out” workbench currently under construction - thanks for taking the time to write this and share it - Matthew
Great article - thanks for the insight